Over the weekend I participated in a catalog launch with the Stampin up team I am apart of and I was asked by my upline to do a facebook live with one of the new stamp sets from the preorder. She asked what I had purchased and I mentioned the Grandkids Stamp set which is a sentiment set. She asked if I would show some ideas on how to market the set and inspiration on how to use the set. Of course I agreed because facebook lives are the next thing I want to try in my social media journey. I was nervous and excited at the same time.
When I looked at the stamp set my anxiety went up because how do I make cards with a sentiment set that are good enough to be used by demonstrators. I took a few days to think about it and then some inspiration hit me. Here is a good look at the stamp set which will be available for purchase on June 3.
I made two cards for the class but I only taught the pop up card. If you would like the instructions on how I made that card I have a pop up card tutorial on the birthday bonanza post. Here is the link for it below:
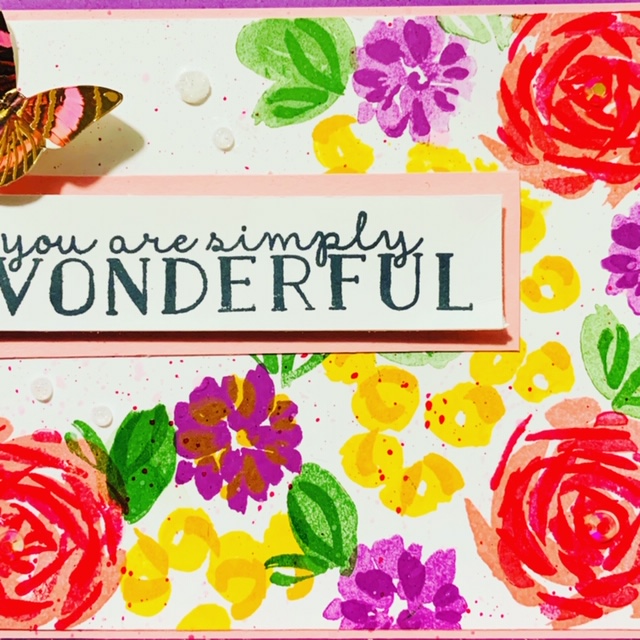
The card I am going to show today uses that stamp set in another way by making it the focal point not in a pop fashion but as a background on the card.
So how did I make the card? Well it was a super easy and it is fun to make your own DSP.
I started with a whisper white card base and began to make layers. I attached a coastal cabana layer to the card base measuring 5 1/2 inches x 4 1/4. I then cut a piece of gorgeous grape cardstock at 5 3/8 x 4 1/8. This gives about an 1/8 border around the layers. I then cut the whisper white layer at 5 1/4 x 4 inches. Before I attached it I wanted to stamp it because I didn't want to get ink on the other layers.
To make the background I put a piece of scrap paper underneath the cardstock so I don't get ink all over. I choose the following ink colors to stamp my different sentiments down on the cardstock: granny apple green, flirty flamingo, daffodil delight, coastal cabana, and pumpkin pie. When I am making a background, I stamp each sentiment or picture three times on the paper. I make sure I vary where I am stamping it and include stamping it off the page as well so it looks like real DSP. I always start with my largest image and work my way to the smallest. I use the smaller images to fill in the spaces and I don't worry about being perfect.
Its time to decorate so I used the circle layered dies to make the scalloped circles and enamel dots to make the center of my flowers. To make my flowers I punched out them using the small blossom punch. I always cut two so I can add dimension.
I like to add ink with a dauber around the edges of the flower because it make it more life like and adds a 3D element.
To shape the flowers I take the piercing mat and the score tool stylus. I go around in a circular motion with the stylus in the middle of the flower with some pressure but not too much so I don't pierce the paper. As I go in the circular motion it causes the petals to come up and make the flower blossom look 3D. I use a dab of glue in the middle and place the other blossom on top so the petals are in between the petals of the bottom layer. I finally add the enamel dot in the center. I will attach the flowers to the card using Stampin dimensional.
Here is the link to my website where you can order this set from on June 3 but you can get lots of inspiration from my site as well.


